If you have ever woken up to a spilled drink on your bed or struggled with dust mites triggering allergies, you already know how valuable a good mattress cover can be. Rather than paying premium prices for store-bought options, learning how to make a mattress cover gives you complete control over fabric choice, fit, and function. Whether you are protecting a new mattress, building a custom sleep system from scratch, or upcycling old sheets, a DIY cover costs a fraction of retail prices and performs better.
This guide walks you through every step of the process. You will learn how to measure accurately, select the right fabric for your sleep needs, choose between closure types, and construct a durable cover that protects your mattress and enhances comfort.
Selecting the Right Mattress Cover Type
Before purchasing fabric or cutting anything, you need to choose the cover type that matches your comfort goals and mattress construction.
Knit Covers vs Quilted Covers
Knit covers use stretchy fabrics like cotton jersey, spandex blends, or cotton-poly knits. These covers hug the mattress surface and allow soft foams to compress naturally without restriction. If you are building with latex or memory foam, knit prevents the annoying drum effect that makes foam feel tight and unresponsive.
Quilted covers have padding stitched between two fabric layers. Common fill options include fiberfill, wool, or thin foam. These add slight firmness and structure, making them ideal for softer support cores or pocketed coil systems. Wool-quilted versions also provide natural temperature regulation and moisture wicking, which benefits hot sleepers and allergy sufferers.
When to Use Each Type
Use knit covers when working with latex, memory foam, or any pressure-relieving comfort layer where you want unrestricted response. Use quilted covers when you need extra surface durability, mild cushioning, or temperature control with wool insulation. For the best of both worlds, consider a split-cover system with a quilted base layer and knit top layer.
Choosing Single vs Split Cover Configuration
The configuration you choose affects how easily you can modify your mattress later and how different layers interact.
Single Cover for All Layers
This method encases your entire mattress stack in one zippered shell. It keeps all layers perfectly aligned and uses minimal fabric and one zipper. However, you cannot easily swap or test individual layers without full disassembly. This works best for finalized builds where you are confident in your layer stack.
Split Cover System
A split cover uses two separate enclosures. The support layer goes in one cover while the comfort layer sits in another. This lets you mix cover types, easily replace toppers, and reduce surface tension that causes the drum effect. The trade-off is needing two zippers and slightly more complex assembly. This configuration suits DIYers who want flexibility to experiment with firmness.
Choosing the Best Fabric for Your Mattress Cover

Your fabric selection determines breathability, durability, washability, and how the cover feels against your skin.
Recommended Fabric Options
| Fabric | Best For | Key Benefits |
|---|---|---|
| Cotton | Cool sleepers, general use | Breathable, soft, natural |
| Linen | Hot climates, eco-builds | Gets softer over time, highly breathable |
| Cotton-Poly Blend | Most DIY projects | Balances durability and affordability |
| Stretch Knit Jersey | Latex/memory foam builds | Prevents drum effect with elasticity |
| Sunbrella | RVs, boats, pets | Waterproof, UV-resistant, extremely durable |
| Organic Cotton | Sensitive skin, eco-goals | No chemicals, sustainable certification |
| Wool-Quilted | Temperature control | Wicks moisture, naturally fire-resistant |
| Waterproof Lining | Kids, pets, medical needs | TPU or polyurethane blocks all liquids |
Avoid non-breathable plastics unless you absolutely need waterproof protection, as they trap heat and create uncomfortable sleep conditions.
Calculating Fabric Yardage
For a standard queen mattress measuring 60 by 80 inches with 10-inch depth, you need approximately 6 to 7 yards of 60-inch-wide fabric. This covers the top and bottom panels plus the boxing band around the perimeter. Always purchase 1 to 2 extra yards to account for errors or pattern matching.
How to Measure Your Mattress for a Perfect Cover Fit

Accurate measurements prevent fit problems that lead to bulking, gapping, or difficult insertion.
Measurement Steps
Measure your mattress length and width at the widest points. Measure the height from the bottom to the top surface. Add seam allowance of 1 inch total for the top and bottom panels. Add 2 inches extra height to accommodate the tuck-under and seam complexity. Calculate the boxing band length by multiplying length times 2 plus width times 2, then add 6 to 12 inches for zipper overlap.
For example, a 72 by 72 by 5-inch mattress needs a top panel of 73 by 73 inches and a boxing band 7 inches high by 160 inches long. When inserting foam layers, add 0.5 to 1 inch to height measurements for easier insertion.
Selecting Zipper vs Elastic Closure for Your Cover
Your closure choice affects washability, ease of mattress insertion, and long-term durability.
Installing a Zipper
Zippers provide full access for cleaning and layer changes. For queen-size covers, you typically need 7 to 10 yards of continuous zipper. Use a zipper foot to stitch close to the teeth. Press placket seams flat before attaching the zipper. Double-stitch the ends for strength. Always leave the zipper partially open when turning the cover right-side-out to prevent tearing.
Using Elastic Corners
Elastic provides a snug fit without the complexity of zippers. Cut four 12-inch pieces of braided knit elastic. Fold each in half to find the center point. Align the center with each fabric corner and stretch the elastic ends along the adjacent edges before stitching. Use quality elastic, as cheap versions lose stretch quickly.
Adding Handles and Design Features to Your Mattress Cover
Functional details improve usability and extend the life of your cover.
Installing Interior Handles
Handles make it easier to insert foam layers or flip the mattress. Cut four strips measuring 3 by 12 inches. Fold them lengthwise and topstitch for strength. Attach them to the inside corners of the top panel before completing final assembly. Use the same fabric or reinforced webbing for durability.
Preventing Panel Misalignment
Large panels shift easily during sewing. Use a washable fabric marker to place match-up marks every 12 inches along the top, bottom, and boxing band. Pin corresponding marks together before sewing to ensure proper alignment.
Preparing Clean Corners
For professional-looking corners, use the right-angle seam method. Fold the corner diagonally, flatten it, and mark the true corner point. Sew directly to that mark for sharp, flat corners. Alternatively, cut 2.5-inch squares from each fabric corner for a fitted-style finish that folds neatly around mattress edges.
Cutting Fabric for Your Mattress Cover
Precise cutting prevents problems during assembly.
Cutting Instructions
Cut the top and bottom panels to mattress length plus 1 inch by mattress width plus 1 inch. Cut the boxing band to height equal to mattress depth plus 2 inches and length equal to perimeter plus 6 to 12 inches for zipper overlap. Cut zip placket strips if using a centered zipper, typically 3 inches wide by the length of the opening. Use a rotary cutter, cutting mat, and straight edge for clean cuts. Never cut draped fabric over a table edge.
Three Ways to Sew Your Mattress Cover
Choose the method matching your skill level and needs.
Method One: Fitted-Style with Elastic
This beginner-friendly approach requires no zipper. Cut fabric to length plus 2 inches and width plus 2 inches. Cut 2.5-inch squares from all corners. Fold right sides together and pin corners. Sew corners using right-angle seams. Attach 12-inch elastic pieces to each corner by stretching and stitching. Turn right-side-out and fit over the mattress. This method takes approximately 1 hour.
Method Two: Full Zipper Enclosure with Boxing Band
This most durable method suits custom builds and high-use environments. Sew zip plackets to either side of the zipper. Attach one placket end to the boxing band. Pin and sew the top panel to the placket and band. Complete the second placket connection. Pin and sew the bottom panel to remaining edges. Trim seam bulk and grade layers. Turn right-side-out and insert the mattress. This method takes 2 to 3 hours.
Method Three: Repurpose an Old Bed Sheet
This budget-friendly eco-option uses a double or queen flat sheet. Use a sheet at least 78 by 76 inches. Cut 2.5-inch squares from corners. Fold right sides together and sew three sides with 1-inch seam allowance. Leave one long edge open. Install the zipper using a zipper foot. Double-stitch ends for strength. Turn and test the fit. This method takes approximately 1.5 hours.
Sewing Techniques for Durable Mattress Covers
Proper stitching ensures your cover lasts for years.
Machine Setup
Set your stitch length to 2.0 to 2.5 millimeters for strength. Use heavy-duty polyester thread. Equip a zipper foot for zipper work and a walking foot to prevent fabric shifting when sewing layers.
Essential Techniques
Double-stitch all stress points including corners and zipper ends. Zigzag stitch internal seams to prevent fraying. Practice seam grading by trimming one layer shorter than the others to reduce bulk. Press all seams flat after sewing for crisp, professional edges.
Preventing the Drum Effect in Mattress Covers
The drum effect ruins comfortable foam mattresses by creating a tight, bouncy surface.
What Causes the Drum Effect
Excessive cover tension over soft foam layers causes this problem. The cover resists compression, the foam rebounds too quickly, and edges feel unnaturally firm. This happens when using non-stretch fabrics, choosing a cover too small for the layer stack, or applying thick quilting over comfort layers.
How to Prevent It
Use stretchy knit fabric for the top panel over soft foams. Size up the cover if your layers total 10 inches, use an 11-inch cover. Avoid thick quilting on the comfort side. Use split covers to isolate tension between support and comfort layers. Remove any restrictive factory topper covers before inserting foam into your DIY cover.
Test by pressing your palm into the foam. If it snaps back instantly, tension is too high.
Sizing Mattress Covers for Deep or Custom Mattresses
Standard sizes fail on thick builds. Use this guide to choose the right cover height.
Height Sizing Guide
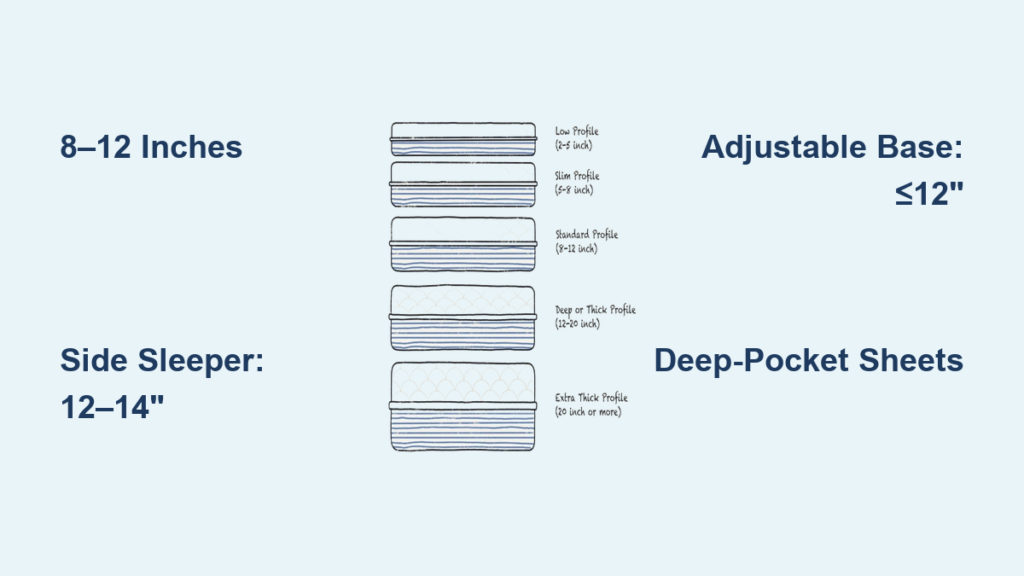
An 8-inch cover fits up to 7.5-inch layer stacks. A 10-inch cover fits 8.5 to 9.5-inch stacks. A 12-inch cover fits 10.5 to 11.5-inch stacks. A 13-inch cover fits 12 to 12.5-inch stacks. Covers 14 inches and above suit custom deep builds. Remember that knit covers can handle 0.5 inches over the stated height due to stretch, while quilted covers must be sized up if layers exceed the cover height.
Maintaining and Extending the Life of Your Mattress Cover
A well-maintained cover lasts many years.
Washing Guidelines
Machine-washable covers should be cleaned in cold water on a gentle cycle and air-dried. For spot-clean-only covers, blot spills immediately and use upholstery cleaner. Refresh the cover annually by hanging it in sunlight to deodorize.
Regular Maintenance
Inspect seams monthly for signs of wear. Re-stitch any loose elastic connections. Replace zippers that become stiff or misaligned. Reinforce corners annually to prevent stress tears.
Troubleshooting Common Problems
Zipper Won’t Close Smoothly
Misaligned sewing or fabric puckering causes this. Re-pin with a zipper foot and use stabilizer fabric to prevent shifting during sewing.
Cover Slips Off the Mattress
Weak elastic or poor corner fit leads to slipping. Increase elastic tension or add non-slip fabric strips to the underside.
Corners Appear Bulky
Inaccurate cutting creates bulk. Use right-angle seams and trim seam allowances to reduce excess fabric.
Fabric Shifts While Sewing
Lack of a walking foot causes shifting. Use a walking foot and double-pin all layers before sewing.
Key Takeaways for Making Your Own Mattress Cover
Making your own mattress cover is not just about saving money. It is about building a better sleep surface tailored to your specific needs. Measure twice and cut once, accounting for seam allowance and height wrap. Choose fabric based on your sleep preferences: knit for foam responsiveness, quilted for structure, breathable natural fibers for temperature control. Select the construction method matching your skill level and needs: fitted elastic for simplicity, full zipper for durability and access, repurposed sheets for budget projects. Finish with proper stitching techniques, pressing seams, and reinforcing stress points.
Whether you are protecting a store-bought mattress or building a custom sleep system, a DIY cover gives you full control over fit, function, and fabric. With accurate measurements, quality materials, and clean construction, you create a protector that enhances comfort, extends mattress life, and fits your bed perfectly.
Frequently Asked Questions About Making a Mattress Cover
What is the easiest method for beginners to make a mattress cover?
The fitted-style method with elastic corners is the easiest for beginners. It requires no zipper installation and uses simple straight seams. You can complete it in about an hour with basic sewing skills.
How much fabric do I need for a queen-size mattress cover?
For a queen mattress measuring 60 by 80 inches with 10-inch depth, you need approximately 6 to 7 yards of 60-inch-wide fabric. Purchase extra to account for errors.
Which fabric prevents the drum effect on memory foam mattresses?
Stretchy knit fabrics like cotton jersey or cotton-poly blends prevent the drum effect. These elastic materials allow foam to compress naturally without restriction.
Can I waterproof my DIY mattress cover?
Yes, add a waterproof lining made of TPU or polyurethane-coated fabric between the outer fabric and the mattress. This works well for kids rooms, pet owners, or medical needs.
How do I make a cover for a non-standard mattress size?
Measure the exact dimensions of your mattress including any irregular angles. Add seam allowance and height wrap. Trace the shape on paper first if dealing with curved areas like boat berths or RV beds.
How often should I wash my mattress cover?
Wash removable covers every 1 to 2 months or immediately after spills. For non-removable covers, spot clean as needed and air out in sunlight annually.