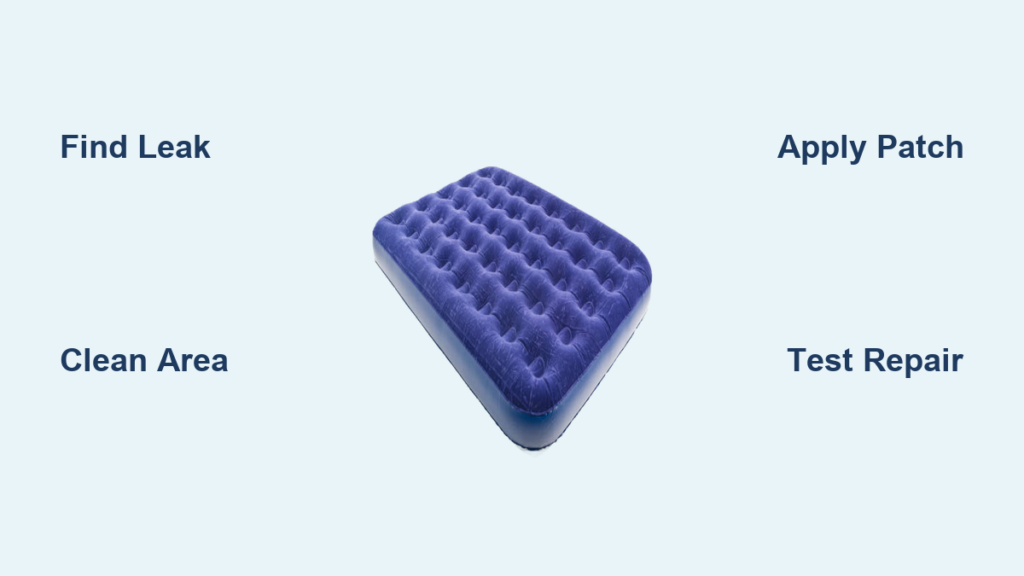
Waking up on a sagging, half-deflated air mattress is frustrating, but it does not mean you need to replace it. Fixing an air mattress is often quick, affordable, and surprisingly effective with the right tools and technique. Most leaks stem from small punctures, valve issues, or seam failures, problems you can diagnose and repair in under an hour. Whether you are dealing with a slow leak, a loud hiss, or a completely flat bed, this guide walks you through proven, step-by-step solutions using household items or simple repair kits.
Locate the Leak Accurately
Before any repair, you must pinpoint where air is escaping. Guessing leads to failed fixes, so use one of these reliable detection methods to find the exact problem spot.
Listen and Feel for Escaping Air
Run your hand slowly over all areas while listening for hissing sounds. This method works best in a quiet room on a flat surface.
- Fully inflate the mattress.
- Place it on a flat, quiet surface.
- Run your hand slowly over all areas, including the top, sides, bottom, seams, and valve.
- Listen closely for hissing sounds.
- Hold a tissue or piece of paper near the surface. If it flutters, air is escaping.
Focus on high-risk zones where leaks most commonly occur. The valve and underside are most prone to damage due to floor debris, pet claws, or improper storage.
Use the Soapy Water Test
This is the most effective method for confirming leaks, especially for small punctures that are hard to find by sound alone.
- Mix warm water with a few drops of dish soap. Dawn works best for creating visible bubbles.
- Spray or sponge the solution onto the mattress surface.
- Watch for bubbles forming. This marks the exact leak location.
- Mark the spot with a pen or tape.
- Flip the mattress and repeat on the bottom.
Test at different inflation levels. Some leaks only appear under full pressure, so checking with the mattress fully inflated gives the most accurate results.
Try the Submersion Method
If you have a smaller portable air bed that fits in a tub, this method provides definitive leak detection.
- Partially inflate the mattress.
- Submerge one section at a time in water.
- Look for rising bubbles indicating escaping air.
- Mark the leak location and dry the area immediately.
This method is only practical for single-person or portable air beds. Larger mattresses cannot be submerged easily.
Prepare the Surface for a Lasting Fix
A clean, dry, properly prepped surface ensures your patch bonds permanently. Skipping prep is the number one reason repairs fail, so take your time with this step.
Clean and Dry the Area
Proper cleaning removes oils, dirt, and soap residue that can prevent adhesives from bonding.
- Deflate the mattress completely.
- Wipe the leak site with mild soap and water.
- Rinse and dry thoroughly. Any moisture prevents adhesion.
- For extra cleaning, wipe with rubbing alcohol to remove oils and soap residue.
Scuff for Stronger Bonding
Scuffing is essential for glue-based repairs but must be skipped for self-adhesive patches.
- Lightly sand the area with fine-grit sandpaper or use a metal lid.
- Use a crosshatch motion to dull the glossy surface.
- Wipe away dust with alcohol after scuffing.
Do not scuff if using self-adhesive patches or repair tape. This can damage the surface and make the patch less effective.
Choose the Right Repair Method

Match the fix to the damage type and your available materials. Different methods work better for different situations.
Apply a Self-Adhesive Patch
Best for small holes under one-quarter inch and included in most repair kits.
- Cut the patch one inch larger than the hole.
- Round the corners to prevent peeling.
- Peel off the backing.
- Center over the hole and press firmly for 30 seconds, moving from center outward.
- Wait 30 minutes before inflating.
Use a credit card to press out air bubbles for better adhesion.
Use PVC Glue and a Vinyl Patch
Ideal for punctures, tears, or high-stress areas on PVC or vinyl mattresses.
- Cut a patch from repair material or inner tube with rounded edges.
- Clean, dry, and scuff the surface.
- Apply PVC glue to both the patch and mattress.
- Let it become tacky, which takes 5 to 15 minutes depending on product.
- Press patch into place and hold for 30 seconds.
- Wait 2 to 3 hours or overnight before use.
Use thick rubber cement for superior flexibility and durability, especially for repairs that will see regular use.
Seal with Repair Tape
Perfect for linear tears or emergency fixes with no drying time required.
- Tear tape by hand. Avoid scissors to preserve adhesive.
- Stretch over the tear, extending one inch beyond on all sides.
- Press firmly along the entire length for 30 seconds.
- Usable immediately, but reaches full strength in 24 hours.
This method works well for outdoor use, camping, or high-movement areas where the mattress may flex repeatedly.
Try Flex Seal Inflatable Patches
Peel-and-stick, UV-resistant patches designed specifically for inflatables.
- Clean and dry the area.
- Cut patch to size. It must fully cover the hole.
- Peel backing slowly and apply from one edge.
- Press firmly with a roller or flat object.
- No drying needed. Inflate and test right away.
Once placed, these patches cannot be repositioned. Align carefully before pressing down.
Fix Common Valve Problems

Valve leaks are common and often mistaken for punctures. Before patching the mattress body, rule out valve issues.
Diagnose a Leaky Valve
Watch for these telltale signs of valve problems. Air hissing from the cap, a valve cap that will not tighten, or a mattress that slowly deflates even with no visible holes all point to valve issues.
Repair or Seal the Valve
- Remove and clean the cap with a damp cloth.
- Ensure the cap clicks or screws on tightly.
- If leaking persists, apply a small drop of silicone sealant around the base.
- Let dry 1 to 2 hours.
- Test with soapy water. No bubbles should form.
Make a DIY Valve Plug
If you have lost the original valve cap, create a temporary plug with household items.
- Carve a wooden stick or dowel into a cone shape.
- Wrap the tip with duct tape for a snug fit.
- Insert during inflation and secure with tape at the base.
Alternatively, use a plastic lid from a spice jar that fits the valve opening.
Repair Bubbles and Bulges
Air trapped between layers causes unsightly bulges that can be uncomfortable and indicate improper inflation.
Flatten the Bubble
- Press firmly on the bulge with your hand.
- Push the trapped air toward the valve.
- Unscrew the nozzle slightly to release air.
- Repeat until the bulge collapses.
Prevent Future Bubbles
Inflate slowly using a pump rather than by mouth. Avoid overinflation. Fill until firm, not rock-hard. Flip the mattress monthly to equalize internal pressure.
Reinforce Sagging Areas
Center sagging occurs from repeated pressure or exceeding weight limits. This is a common issue with older air mattresses.
Support the Mattress
Place a foam topper or inflatable base underneath. Use on a flat, supportive surface, not directly on carpet or hardwood. Never exceed the manufacturer weight capacity. Check the label for limits.
Prevent Further Sagging
Distribute weight evenly by avoiding sitting on the edges. Use a mattress cover or topper to reduce strain on the central area.
Test the Repair Before Use
Never assume the fix worked. Always verify with a test before relying on the mattress for a full night sleep.
Soapy Water Retest
- Re-inflate the mattress.
- Spray soapy water over the repaired area.
- No bubbles means success.
- If bubbles appear, repeat the repair with better prep and longer cure time.
Real-World Overnight Test
Let someone sleep on it for 8 hours. Check for air loss, patch lifting, or unusual noise throughout the night.
Extended Inflation Check
Inflate and leave for 12 hours. Monitor for gradual deflation. Mark the air level with tape and compare in the morning.
Prevent Future Air Loss
Most air mattress failures are preventable with simple habits and proper care.
Use a Protective Layer
Indoors, place a sheet, blanket, or rug underneath. Outdoors, use a tarp, ground cloth, or bamboo mat. Never place directly on gravel or grass.
Store Properly
- Deflate completely.
- Wipe down and ensure fully dry.
- Roll tightly and store in a cool, dark place.
- Keep in the original bag or a storage sack.
Never store folded. This weakens seams and causes cracks that lead to future leaks.
Avoid Common Damage Traps
Remove sharp objects like keys and jewelry before use. Keep pet claws trimmed. Do not drag the mattress when inflated. Lift it instead. Do not overinflate, especially in cold weather when air contracts.
Manage Temperature Effects
Cold rooms cause air to shrink. Inflate closer to bedtime for best results. Use a space heater or mattress pad to stabilize temperature if needed.
Emergency Fixes Without a Kit
No repair kit available? Try these quick solutions using household items.
Duct Tape and Chewing Gum
- Chew gum until soft.
- Press into the hole from the inside.
- Cover with duct tape on the outside.
- Add a second layer for reinforcement.
Use only as a temporary fix. This method is not durable under pressure.
Hot Glue or Candle Wax
Hot glue works with a low-temp gun. Apply and let cool 10 minutes. Candle wax can be melted over the hole, let harden, then sealed with tape. Both methods can crack when flexed, so use for short-term only.
Inflate with a Trash Bag
No pump? Use a large garbage bag.
- Swing the open bag to fill with air.
- Seal the top and insert into the valve.
- Squeeze air into the mattress.
- Repeat until firm.
Use thick, durable bags. Avoid thin plastic that may tear.
Choose the Best Repair for Your Material
Not all fixes work on every air mattress. Different materials require different approaches.
PVC and Vinyl Mattresses
These are the most common types. Use PVC glue, rubber cement, or self-adhesive patches. Always scuff before gluing for best adhesion.
Tritech and Laminated Fabrics
These multi-layer materials from brands like Bestway are puncture-resistant but require aggressive adhesives like thick rubber cement. They respond well to scuffing and extended cure times.
Premium Models with Internal Beams
Leaks often occur at beam connections. Use flexible repair tape or liquid sealants like Aquaseal for the best results.
Never iron or heat patches. This can melt internal structures and cause more damage.
Frequently Asked Questions About Fixing an Air Mattress
How do I find a leak in my air mattress if I cannot hear it?
Use the soapy water test. Mix dish soap with warm water and spray it over the mattress surface. Bubbles will form wherever air is escaping. This method works for small leaks that produce no audible sound.
Can I use regular glue to fix an air mattress?
Regular craft glue will not work. You need PVC glue, rubber cement, or a specialized repair adhesive. These products are designed to bond with vinyl and PVC materials and flex without cracking.
How long does an air mattress repair take to dry?
Self-adhesive patches require 30 minutes. PVC glue and rubber cement need 2 to 3 hours minimum, though overnight yields stronger results. Repair tape can be used immediately but reaches full strength in 24 hours.
Why does my air mattress keep losing air even after patching?
The leak may be in a different location. Recheck the entire mattress, including the valve and underside. Temperature changes can also cause normal air loss. If deflation exceeds 1 to 2 inches overnight, investigate further.
Can I fix a tear instead of a puncture?
Yes. For linear tears, repair tape works best. Apply the tape with one inch of overlap on each side of the tear. Press firmly and allow 24 hours for full strength before heavy use.
Is it worth repairing an old air mattress?
If the mattress has multiple punctures or shows signs of material degradation like cracking or stiffening, replacement may be more practical. However, a single leak or minor valve issue is usually worth fixing.
Key Takeaways for Fixing Your Air Mattress
Most air mattress problems are fixable with basic tools and a little patience. The key is accurate leak detection using the soapy water test, proper surface preparation including cleaning and scuffing, and choosing the right repair method for your specific material type. PVC glue with a vinyl patch offers the most durable fix, while repair tape provides quick emergency solutions.
Prevent future damage by using protective layers, storing properly deflated and rolled, and avoiding overinflation. Temperature management matters too, since cold air contracts and causes apparent deflation. With these methods, you can extend your mattress life for years, saving money and reducing waste.
If repairs become frequent despite proper care, consider upgrading to a model with reinforced seams and higher durability. For now, grab your patch kit and restore your air mattress to full functionality.