A dirty mattress can harbor dust mites, sweat stains, allergens, and lingering odors—often without you even noticing. If you’re looking for a deep, chemical-free way to refresh your bed, how to clean a mattress with a handheld steamer is one of the most effective DIY solutions. Unlike surface-level cleaning methods, steam penetrates deep into fabric layers to sanitize, deodorize, and loosen grime without soaking the material. This guide walks you through every step, from prep to drying, so you can safely and thoroughly clean your mattress using just a handheld steamer and common household tools.
Whether you’re tackling pet accidents, nighttime sweating, or seasonal deep cleaning, steam cleaning kills 99.9% of dust mites and bacteria on contact. It works well on memory foam, hybrid, innerspring, and latex models when done correctly. With proper technique, your mattress will dry in as little as 3 to 6 hours and feel fresher for months.
Prepare the Mattress Surface for Deep Cleaning
Before any steam touches the fabric, proper preparation ensures maximum effectiveness and prevents damage to your mattress.
Strip All Bedding Completely
Remove every layer from your mattress: sheets, pillowcases, mattress protectors, toppers, and underlays. Wash these separately according to their care labels, especially if you’re dealing with sweat, spills, or allergens. Exposing the bare mattress gives you full access for cleaning and helps you identify problem areas like yellowed spots or worn seams that need extra attention.
Vacuum Thoroughly First
Use an upright vacuum with an upholstery attachment to remove surface debris. Focus on these areas where dust accumulates most:
- Seams and edges where particles collect
- Tufted buttons or stitching pockets
- Zippered covers or decorative details
Vacuuming removes up to 80% of loose particles, including dead skin cells, pet dander, and dust mite residue. Skipping this step forces steam to push dirt deeper into fibers instead of lifting it out.
Pro Tip: Run the vacuum slowly in overlapping passes. Listen for changes in suction noise—muffled sounds may indicate hidden moisture or compaction.
Gather Your Cleaning Tools and Supplies
Having the right equipment ready prevents interruptions during the steaming process and protects your mattress from damage.
Essential Equipment List
You will need these items for a successful mattress steaming session:
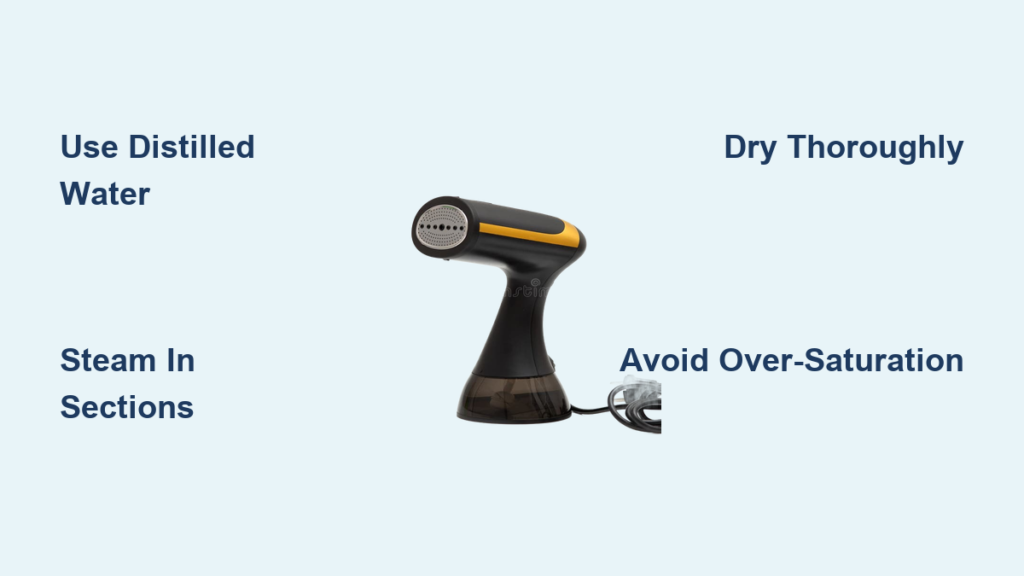
- Handheld garment steamer with continuous steam function
- Distilled water to prevent mineral buildup
- Upholstery vacuum
- Microfiber cloths for blotting, not rubbing
- Fan or dehumidifier for faster drying
Avoid using steam mops or heavy-duty industrial units because they deliver too much moisture for delicate mattress materials.
Why Distilled Water Matters
Tap water contains minerals like calcium and magnesium that can clog steamer nozzles over time, leave white residue on dark fabrics, and reduce your device’s lifespan. Using distilled water protects your steamer and ensures clean, consistent steam output throughout the cleaning process.
Fill and Heat the Steamer Properly
Load Water and Power On
Fill the steamer reservoir to the marked line with distilled water only. Overfilling risks leaks, while underfilling shortens your cleaning time. Plug in the unit and allow it to heat fully. Most handheld models take 2 to 5 minutes to reach operating temperature, typically between 175°F and 212°F.
Check Steam Output Before Use
Test the steamer on a towel or inconspicuous corner of the mattress first. Look for these indicators of proper function:
- Steady, visible vapor that isn’t dripping water
- No sputtering or spitting
- Consistent pressure
If steam is weak or watery, wait longer or descale the unit. A properly heated steamer delivers dry vapor that sanitizes without soaking the fabric.
Warning: Never use a steamer that sprays liquid water. This increases mold risk and can damage your mattress core.
Steam Clean Section by Section
:max_bytes(150000):strip_icc()/how-to-steam-clean-a-mattress-5101192-hero-0a1a68a684094d4588f265761ec6fbc6.jpg)
Work systematically to avoid missing spots or over-wetting any area of your mattress.
Start at One Corner
Begin at the head of the bed and move side-to-side in 1 to 2 square foot sections. Hold the nozzle 1 to 2 inches above the surface, or lightly glide it across fabric, depending on manufacturer guidance for your specific steamer model.
Use Slow, Even Strokes
Move the steamer slowly, about 1 inch per second, to allow heat to penetrate deeply. Rapid passes won’t sanitize thoroughly, while lingering too long risks moisture pooling, especially on foam-based mattresses.
Visual Cue: The fabric should look slightly damp but never wet. If water beads form, stop immediately and blot with a dry microfiber cloth.
Don’t Steam Too Long in One Spot
Limit exposure to 10 to 15 seconds per section. Foam cores absorb heat quickly, and prolonged steaming can degrade adhesive layers or cause warping. Less is more when it comes to steam cleaning delicate mattress materials.
Target Stains and Problem Areas
Spot-treating specific zones delivers better results than steaming uniformly across the entire surface.
Focus on Soiled Spots
These common trouble zones need extra attention during your cleaning session:
- Center of the mattress where body oils and sweat accumulate
- Near the head where hair products and facial oils transfer
- Edges where dust buildup and pet contact occur
For stains, pause the steamer over the area for an extra 5 to 10 seconds to loosen residue, then blot immediately with a dry microfiber cloth. Never scrub, as this damages fabric fibers.
Note: Steam lifts organic matter but won’t remove set-in stains like urine or blood. For those, pretreat with an enzyme cleaner before steaming.
Eliminate Odors at the Source
High heat breaks down odor-causing bacteria from sweat, pets, or mildew. For added freshness after steaming, sprinkle baking soda mixed with 5 to 10 drops of tea tree or lavender oil over the mattress. Let it sit for 60 minutes, then vacuum completely. Tea tree oil adds natural antimicrobial power while lavender promotes relaxation for better sleep.
Dry the Mattress Completely
Moisture left inside the core leads to mold, mildew, and material breakdown that can ruin your mattress.
Airflow Is Critical
Place fans around the bed to circulate air across all surfaces. Open windows if humidity is low outside. For faster drying, position a fan at the foot of the bed, use a dehumidifier in damp climates, and rotate the mattress halfway through drying if it’s safe to lift.
Avoid sleeping on the bed until fully dry. Minimum drying time is 3 to 4 hours, but thick hybrids or memory foam may need up to 8 hours.
Test for Dryness: Press a dry hand against the mattress. If it feels cool or damp, wait longer before covering it.
Never Use Direct Heat Sources
Do not place space heaters, hairdryers, or radiators near the mattress. Excessive heat can damage foam integrity or melt internal components. Let air circulation do the work naturally.
Follow Safety Best Practices
Protect both your mattress and yourself by following these smart usage habits.
Avoid Oversaturation at All Costs
The goal is heat penetration, not wetting the fabric. Use short bursts or continuous low-to-moderate steam. Too much moisture weakens glue in layered foams, promotes microbial regrowth, and may void your warranty.
Rule of Thumb: If the cover feels soaked, you’ve used too much steam. Stop immediately and blot dry.
Test First on Hidden Areas
Try the steamer on a corner under the bed frame first. Check for fabric shrinkage, color fading, or texture changes. Some synthetic blends react poorly to high heat.
Don’t Use on Waterproof Covers
Vinyl or plastic-backed protectors trap steam and may delaminate or warp. Only steam mattresses with breathable fabric covers unless the manufacturer explicitly approves otherwise.
Unplug and Cool Down After Use
Let the steamer cool completely before storing. Empty leftover water to prevent scale buildup and maintain performance for your next cleaning session.
Know Which Mattresses Can Be Steamed
Not all beds respond well to steam, so check your type and construction before proceeding.
| Mattress Type | Safe to Steam? | Key Notes |
|---|---|---|
| Memory Foam | Yes | Limit time; dry thoroughly |
| Innerspring | Yes | Avoid edges near coils |
| Hybrid | Yes | Combine foam and coil care |
| Latex | Yes | Naturally mold-resistant |
| Airbeds | Check label | Heat may weaken seams |
| Waterproof Covers | No | Risk of trapped moisture |
When in doubt, consult your mattress care manual. Some warranties void if moisture enters the core, even from steam.
Maintain Long-Term Mattress Hygiene
Keep your bed fresh between deep cleanings with these ongoing practices.
Clean Every 3 to 6 Months
Steam clean every 3 months if you have pets, allergies, or experience heavy sweating. Every 6 months works for general maintenance. Pair with monthly vacuuming to control allergens between sessions.
Use a Washable Mattress Protector
Choose a breathable, zippered cover that blocks liquids and dust while allowing heat to escape. It should be machine-washable monthly. This reduces the need for frequent steaming and protects your investment.
Service Your Steamer Monthly
Even with distilled water, mineral deposits build up. Descale every 3 to 4 uses by filling the tank with equal parts white vinegar and water, running the steamer for 5 minutes over a sink, then rinsing with distilled water twice. This extends device life and maintains steam quality.
Compare Steaming to Other Methods

Understanding how steam cleaning stacks up helps you choose the right method for your needs.
| Method | Kills Germs? | Dries Fast? | Safe for Foam? | Cost |
|---|---|---|---|---|
| Handheld Steamer | Yes | 3-6 hours | Yes with care | $30-$80 |
| Baking Soda Only | No | Immediate | Yes | Under $5 |
| Commercial Extractor | Moderate | 8-24 hours | Risk of soak | $100+ |
| Dry Cleaning Powder | Limited | Immediate | Yes | $10-$20 |
Steam cleaning wins for sanitization, speed, and safety, especially for foam-based beds.
When to Avoid DIY Steaming
Some situations require professional help instead of at-home steam cleaning.
- Biological contamination: Urine, blood, or fecal matter needs enzyme treatments plus professional extraction
- Visible mold growth: Indicates chronic moisture; steam may spread spores
- Water-damaged mattress: Replace rather than attempt to clean
- Severe sagging or delamination: Signs of structural failure that steaming cannot fix
Steaming refreshes a healthy mattress but won’t fix physical wear or replace professional cleaning for severe problems.
Final Tips for Best Results
Maximize your cleaning session with these expert-backed strategies.
Combine Vacuum and Steam
This two-step method removes both loose and embedded contaminants. Vacuum first, then steam, then vacuum again after drying for maximum allergen reduction.
Control Room Humidity
Ideal sleeping environment is 30% to 50% relative humidity. High humidity slows drying and encourages dust mites. Use a hygrometer to monitor levels in your bedroom.
Add Essential Oils Wisely
Lavender, eucalyptus, or tea tree oil mixed with baking soda enhances scent and adds mild antimicrobial action. Never add oils directly to the steamer, as this damages internal parts.
Rotate Your Mattress Regularly
If your mattress is double-sided, flip every 3 to 6 months. If one-sided, rotate head-to-foot instead. This prevents uneven wear and extends the lifespan of your mattress.
Frequently Asked Questions About Cleaning a Mattress with a Handheld Steamer
Can I use a handheld steamer on memory foam mattresses?
Yes, you can steam memory foam mattresses with caution. Limit your steam exposure time to 10 to 15 seconds per section and ensure thorough drying afterward. The key is avoiding moisture pooling that can damage foam cells.
How long does it take for a mattress to dry after steam cleaning?
Most mattresses dry within 3 to 6 hours when using proper technique. Thicker hybrid or memory foam models may need up to 8 hours. Use fans and ensure good air circulation to speed up drying.
Does steam cleaning kill dust mites and bed bugs?
Yes, steam at temperatures above 150°F kills 99.9% of dust mites and bed bugs on contact. Handheld steamers typically reach 175°F to 212°F, making them effective for sanitization.
Can I steam clean a mattress with a waterproof protector?
No, you should avoid steaming mattresses with waterproof or vinyl covers. The heat can warp or delaminate synthetic coatings, and trapped moisture creates mold risks. Remove the protector before steaming.
How often should I steam clean my mattress?
Steam clean every 3 to 6 months depending on your household. Homes with pets, allergy sufferers, or heavy sweaters benefit from monthly steaming. Otherwise, twice yearly maintains hygiene.
Will steam cleaning remove old stains?
Steam loosens ground-in dirt and organic stains but may not remove set-in stains like urine or blood. Pretreat these with an enzyme cleaner before steaming for better results.
Key Takeaways for Cleaning Your Mattress with a Handheld Steamer
Cleaning a mattress with a handheld steamer is a powerful, eco-friendly way to improve sleep hygiene without harsh chemicals. The process involves preparing the surface by stripping bedding and vacuuming thoroughly, then steaming in small sections using slow, even strokes while keeping the nozzle moving to prevent oversaturation. Target stains and odor zones with targeted steam application and blotting, then ensure complete drying time of 3 to 8 hours before reusing the mattress.
For lasting results, repeat the steam cleaning process every 3 to 6 months, use a washable mattress protector, and maintain your steamer by descaling regularly. With just $30 to $80 in equipment and a few hours of effort, your bed can feel like new again while eliminating allergens, bacteria, and odors safely and effectively.