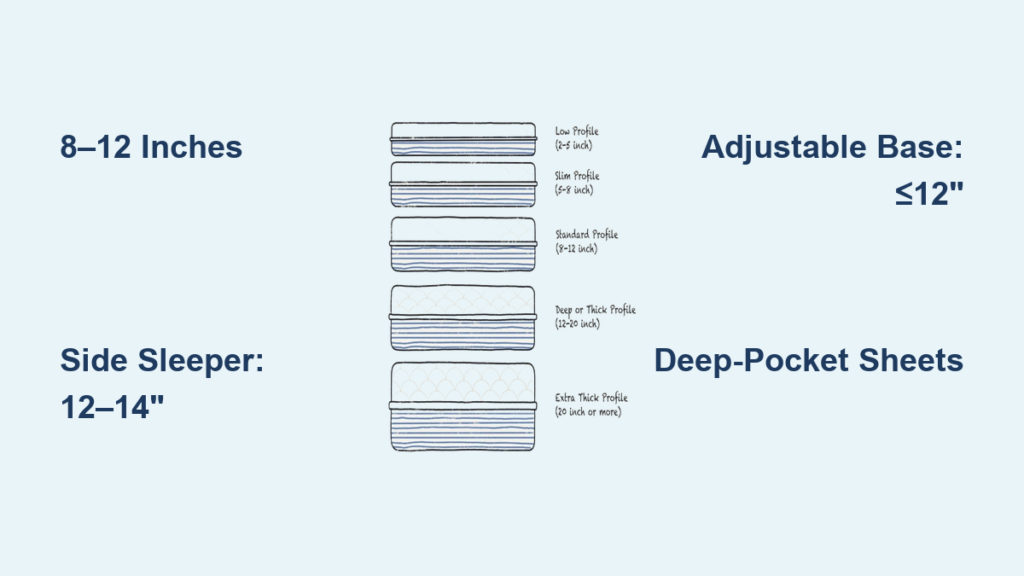
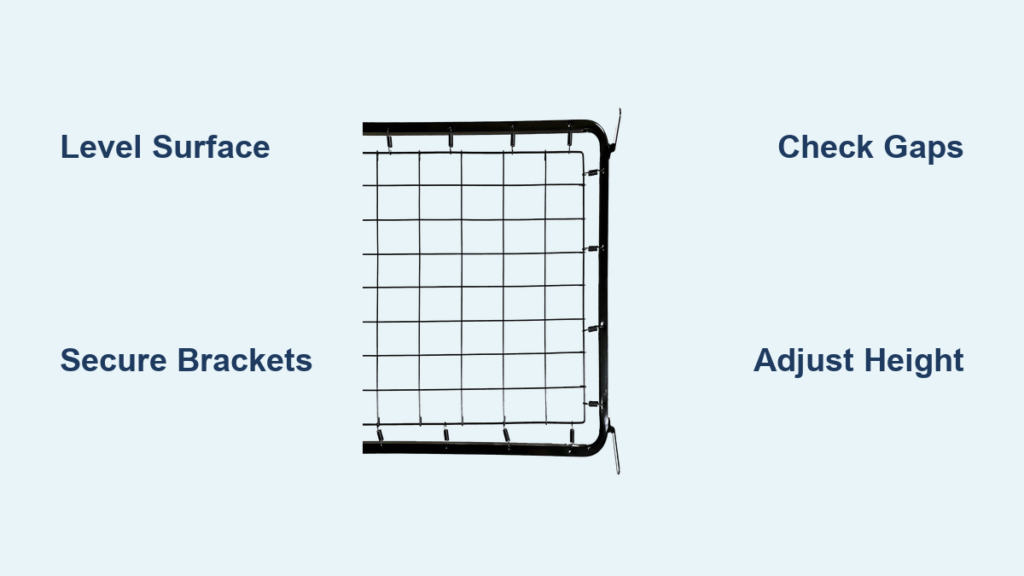
A properly installed crib mattress support is the foundation of a safe sleeping environment for your baby. This critical component holds the mattress securely in place, maintains proper spacing from the crib sides, and prevents entrapment hazards. Whether you’re assembling a new crib or reusing an older model, knowing how to install crib mattress support correctly ensures stability, compliance with safety standards, and long-term durability. In this guide, you’ll learn step-by-step installation procedures, model-specific tips for brands like Delta Children, safety best practices, and how to troubleshoot common issues so your baby sleeps safely from day one.
Prepare the Crib for Installation
Before installing the mattress support, ensure the crib is ready for assembly. A stable, clean workspace reduces the risk of errors and damage during the installation process.
Clear and Level the Work Area
Place the crib on a flat, soft surface like carpet or padding to prevent scratches and tipping. Remove all packaging materials, stickers, and protective films from the crib frame and hardware. Confirm that all four legs are intact and sit evenly on the floor.
Gather Required Tools
Most crib mattress supports require minimal tools for successful installation:
- Phillips-head screwdriver or power drill with a #2 bit
- Allen wrench (if included with your model)
- Owner’s manual (recommended for exact specifications)
Having the correct tools on hand speeds up installation and ensures secure fastening throughout the process.
Identify Mattress Support Components
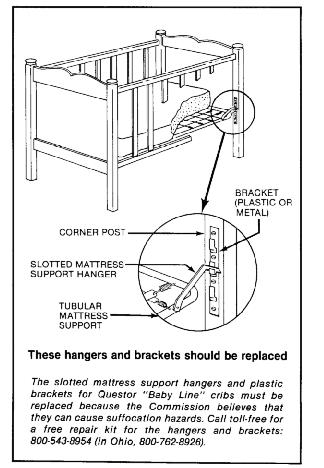
Understanding the parts of your mattress support system prevents misassembly and enhances overall safety. Taking time to identify each component ensures nothing gets overlooked.
Locate Key Parts
The mattress support system consists of several important components:
- Support board: A rectangular wooden or metal grid that holds the mattress
- Brackets or hangers: L-shaped metal pieces that connect the board to the crib rails
- Hardware: Screws, bolts, washers, or pins (use only manufacturer-provided parts)
- Stabilizer bars (on some models): Crossbars that prevent sagging over time
Check that all components are present and undamaged. Discard any cracked, bent, or warped pieces immediately.
Match Parts to Crib Rails
Most cribs have pre-drilled height adjustment slots on the interior of both side rails. These allow the support to be set at three distinct levels. The highest setting works best for newborns and eases lifting. The middle setting suits babies who can sit unassisted. The lowest setting is appropriate for standers and toddlers. Ensure the support board aligns with the chosen height setting before securing any fasteners.
Insert and Align the Support Board
Proper alignment is crucial for stability and even weight distribution across the entire support system. Taking time to get this step right prevents problems later.
Slide Board Into Crib Frame
With the crib upright, lower the drop side (if applicable) and insert the support board from the top. Guide it into the fixed side rail first, ensuring the bracket holes line up with the selected height slots on the rail.
The board should sit horizontally and flush against the rail openings. If it binds or tilts, check for debris in the slots or misalignment before proceeding.
Confirm Horizontal Position
Once inserted, verify the board runs parallel to the floor. Use a small level if available, or visually compare both ends of the board. Misaligned supports can cause mattress tilt and create instability that compromises safety.
Attach Brackets to Side Rails
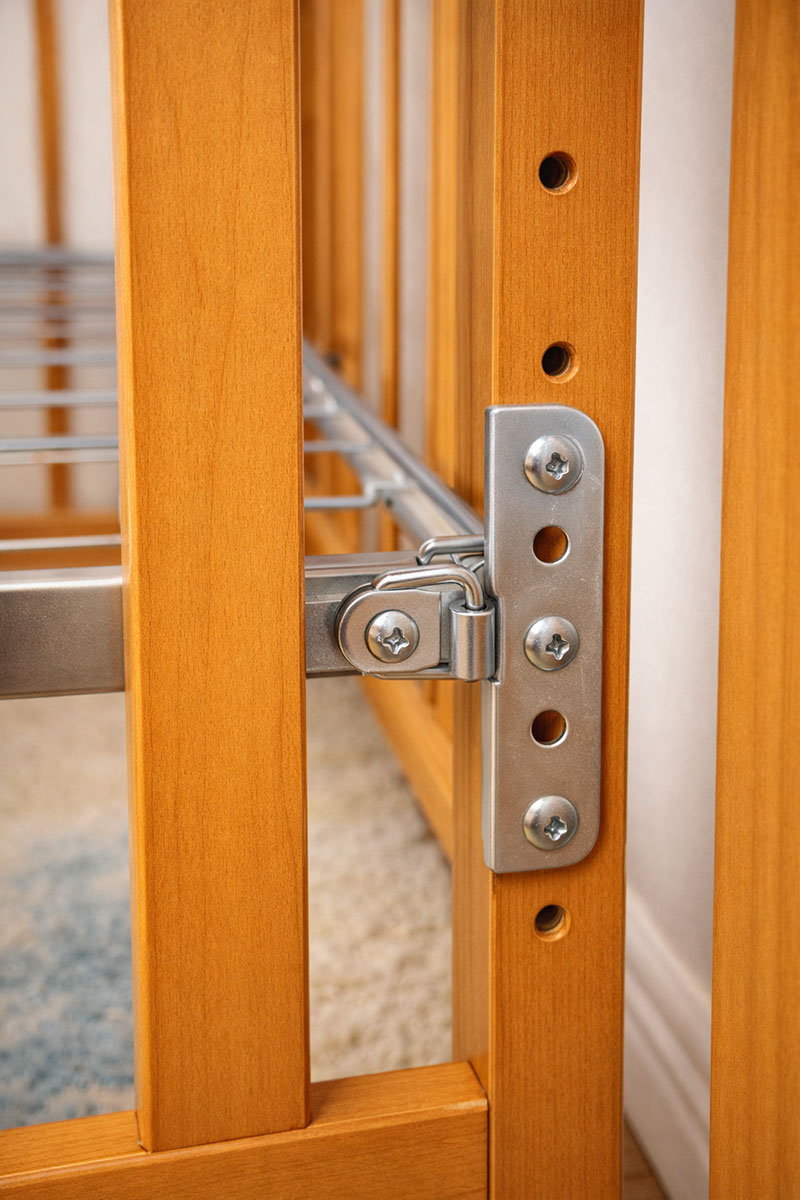
Securing the brackets firmly ensures the support will not shift under load during use. This step requires attention to detail and proper fastener tightness.
Fasten Fixed Side First
On the stationary side of the crib, follow these steps:
- Place a bracket over the support board’s edge
- Align screw holes with those in the crib rail
- Insert and tighten screws using a screwdriver or drill
Repeat for both front and back corners on the fixed side before moving to the opposite rail.
Connect Drop Side (If Applicable)
Carefully raise the crib upright if it is on its side. Then complete the following:
- Align the opposite end of the board with the drop-side rail
- Install brackets using the same method as the fixed side
- Double-check that both sides use the same height setting
Mismatched heights create a tilted surface, which increases fall risk and causes premature wear on hardware. This is a critical safety consideration.
Install Stabilizer Bars (If Included)
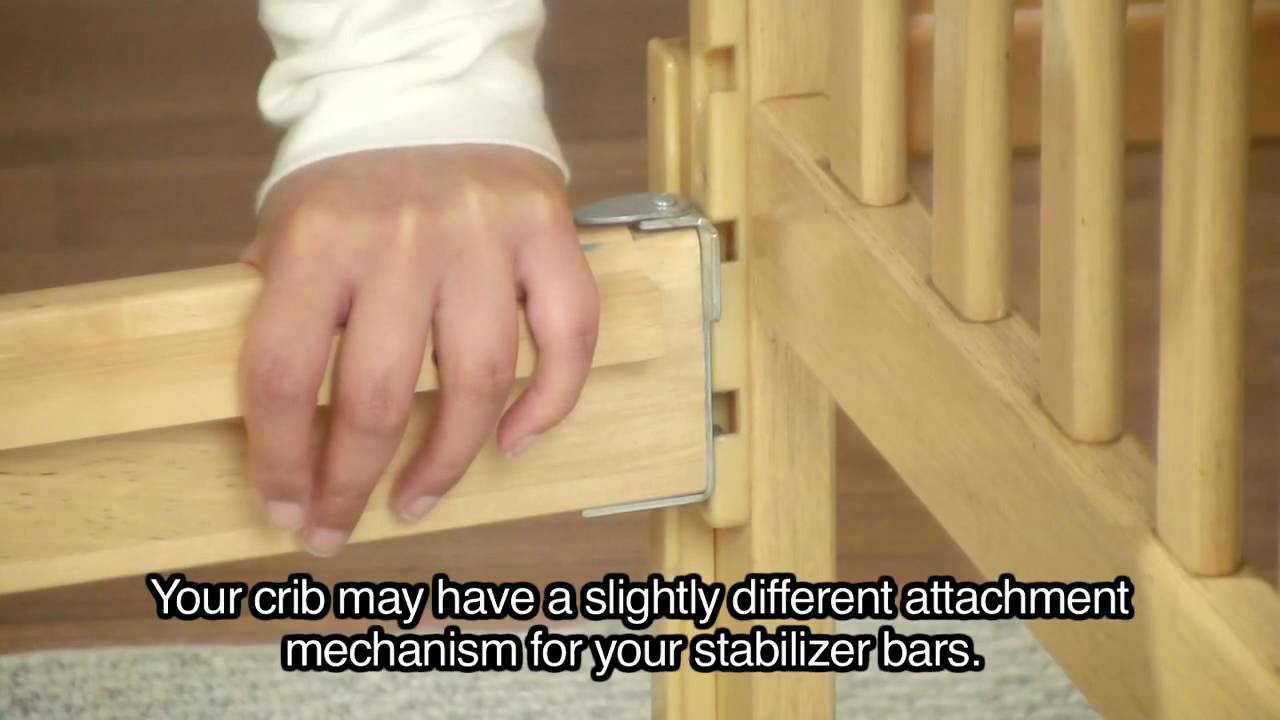
Some models, especially older Delta Children cribs, include stabilizer bars to reduce flexing and extend the life of the support system. These components add significant structural integrity.
Position Perpendicular Bars
Stabilizer bars run across the support board at intervals, often near the center. Attach them using one of these methods:
- Clips that snap into pre-drilled holes
- Screws through metal brackets
- Spring-loaded connectors
Follow your model’s specific instructions for placement intervals and attachment method.
Ensure Level and Clearance
Make sure bars are straight and do not protrude above the support surface. They must not interfere with mattress placement or create pressure points that could damage the mattress.
Stabilizer bars significantly extend the life of wooden boards by preventing sagging under long-term use. This is particularly important for cribs that will see multiple children.
Verify Stability and Levelness
A wobbly or uneven support compromises safety and comfort for your baby. Thorough testing after installation catches problems before the crib is put into use.
Perform Pressure Test
Press down firmly on the center, corners, and edges of the board. The support should remain rigid without shifting side-to-side. There should be no creaking or flexing sounds. If movement occurs, recheck bracket tightness and alignment immediately.
Check for Level Surface
Use a bubble level or visually inspect from both directions. An unlevel support can lead to poor posture and increased risk of rolling. The support passes inspection when there are no gaps, wobble, or tilt. All fasteners should be snug and secure.
Adjust Mattress Height Based on Age
Correct height positioning adapts to your baby’s development and reduces injury risk throughout the crib’s use. Making these adjustments promptly as your child grows is essential.
Follow Development-Based Settings
| Stage | Height Setting | Why It Matters |
|---|---|---|
| Newborn to ~6 months | Highest | Minimizes back strain when lifting |
| Sits unassisted | Middle | Reduces reach over rail |
| Pulls to stand | Lowest | Prevents climbing and falls |
Lower the mattress as soon as your baby shows signs of mobility. Waiting too long increases fall risk significantly.
How to Change Height
To adjust the mattress height, follow these steps:
- Remove mattress and all bedding from the crib
- Unscrew brackets on both sides of the support
- Lift support board and reposition in lower slots
- Reattach brackets and test stability
This adjustment takes approximately 5 to 10 minutes with basic tools.
Install the Mattress Correctly
The final step completes the safe sleep setup and ensures your baby has a proper sleeping surface. Never skip this verification step.
Choose the Right Mattress
Use a firm, snug-fitting crib mattress measuring 28 inches by 52 inches. Softer or smaller mattresses increase suffocation and entrapment risks dramatically. Always purchase a certified safety-approved mattress.
Fit and Test
Place the mattress on the support and check for gaps. The maximum allowable gap is 1 inch (2.5 cm). Test by sliding a soda can between mattress and crib wall. If it fits, the gap is too large and the mattress needs replacement. Press down on the mattress to ensure it does not compress excessively or tilt in any direction.
Delta Children Crib-Specific Tips
Delta Children cribs are common in homes and daycare centers. While many are older drop-side models, correct installation remains vital for safety.
Special Considerations
- Wood-composite boards are prone to warping over time and require regular inspection
- Pin-based locks require spring-loaded pins to engage fully in their slots
- Bracket spacing is typically 1.5 to 2 inches apart vertically
Check these components regularly and replace any worn parts promptly.
Safety Warning: Drop-Side Cribs
As of 2011, the U.S. Consumer Product Safety Commission (CPSC) banned new drop-side cribs due to entrapment risks. However, existing units can still be used only if all hardware is intact, the mechanism operates smoothly, and no recalls apply to your specific model.
Check for recalls by visiting www.cpsc.gov and searching by model number. Many Delta drop-side cribs were recalled between 2007 and 2010. If any part is damaged or missing, discontinue use and consider upgrading to a fixed-side crib.
Troubleshoot Common Installation Issues
Even with careful assembly, problems can arise. Here is how to fix them quickly and effectively.
Support Wobbles or Sags
This issue typically stems from loose screws, a warped board, or a missing stabilizer bar. To fix this, retighten all screws to proper torque specifications. Replace cracked or bent boards that cannot be salvaged. Reinstall stabilizer bars if your model includes them.
Tap the board lightly with your hand. Excessive bounce indicates structural weakness that requires attention.
Board Won’t Align with Slots
This problem occurs due to debris in rail slots, incorrect orientation, or damaged rails. Clean slots with a dry cloth or soft brush. Rotate the board to match front and back indicators if marked. Consult your manual for correct placement if problems persist. Never force the board, as this can strip screw holes.
Difficulty Operating Drop Side
Misaligned support, a bent bracket, or a worn mechanism can cause operational difficulties. Realign the support at matching height settings on both sides. Inspect for bent metal or broken plastic guides. Discontinue use immediately if the mechanism fails to lock securely in place.
Large Gap Between Mattress and Crib
Wrong-sized mattresses or an unlevel support cause this common issue. Replace with a standard 28 by 52 inch mattress. Re-level the support board and recheck bracket alignment on both sides. Never use rolled towels or padding to fill gaps, as this violates safety guidelines and creates new hazards.
Follow Safety Guidelines and Best Practices
Safe installation goes beyond screws and brackets. It includes ongoing vigilance and adherence to established standards.
Adhere to CPSC Standards
All cribs must meet federal safety rules. Gaps must be 1 inch or less between mattress and crib. The support must hold 50 pounds or more without failure. There must be no loose, broken, or missing hardware.
Use OEM Hardware Only
Aftermarket screws or brackets may not meet the strength requirements of original equipment. Always use manufacturer-provided parts for repairs and replacements.
Monthly Inspection Routine
Check for these issues during regular inspections:
- Loose screws or wobbly brackets
- Cracks, warping, or splitting in wood
- Smooth operation of drop-side mechanisms (if applicable)
Tighten fasteners every 4 to 6 weeks, especially in high-use environments like daycare settings.
Maintain and Extend Lifespan
With proper care, a mattress support can last through multiple children, making it a worthwhile investment.
Clean Safely
Wipe the board with a dry or slightly damp cloth. Avoid harsh cleaners, excessive moisture, and submersion in water. Moisture leads to warping and mold growth that compromises structural integrity.
Replace Damaged Parts Immediately
Replace the support if you notice visible cracks or splits in wood, bent or corroded metal brackets, or persistent sagging despite tightening. Contact the manufacturer for replacement parts. Delta Children offers limited warranties, typically 1 year, and may provide components upon product registration.
Upgrade for Maximum Safety
While older cribs can be safe when well-maintained, upgrading offers peace of mind and modern safety features.
Why Choose Fixed-Side Cribs
Fixed-side cribs eliminate drop-side failure risks entirely. They feature a simpler, more durable design that meets current CPSC standards. Many modern cribs allow tool-free height adjustments and convert to toddler beds as your child grows.
When to Retire an Old Crib
Stop using a crib if it has a drop-side with faulty hardware, the model is recalled (check the CPSC database), or the support board shows structural damage. One parent shared that they did not realize their crib was recalled until checking online and replaced it immediately. The risk was not worth the convenience of keeping the old crib.
Final Checklist: Did You Install It Right?
Before using the crib, verify each of these items:
- Support board is level and secure
- All brackets attached at the same height
- No wobble under pressure
- Mattress fits snugly with no more than 1-inch gap
- Correct height setting for baby’s age
- Drop-side (if present) operates smoothly and locks
If all boxes are checked, your crib is ready for safe use.
Need Help? Find Model-Specific Support
Lost your manual? No problem. Help is available through several channels.
Access Digital Resources
Visit the manufacturer website for your crib. Delta Children provides support at deltachildren.com/support. Search by model number, which is usually found on a label inside the headboard or footboard. Many brands offer PDF manuals, video guides, and customer service hotlines.
Still Stuck?
Consider professional help. Baby gear retailers often offer assembly services. Local handymen can inspect and secure older cribs. Never guess when safety is involved.
Frequently Asked Questions About Installing Crib Mattress Support
How do I know if my crib mattress support is installed correctly?
The support board should be perfectly level with no wobble when you press down on it. All four brackets must be secured at matching height positions. The mattress should fit snugly with no gap larger than 1 inch between it and the crib sides.
What tools do I need to install a crib mattress support?
Most installations require only a Phillips-head screwdriver or power drill with a #2 bit. Some models use an Allen wrench. Always check your crib’s manual for specific tool requirements.
Can I use my crib if the mattress support wobbles slightly?
No. A wobbling support indicates loose fasteners or structural damage. Tighten all screws first. If wobble persists, inspect for cracked boards or bent brackets and replace affected components before use.
How often should I check the mattress support hardware?
Inspect the support monthly and after any moves or adjustments. Tighten loose screws every 4 to 6 weeks, particularly in cribs that see daily use.
Is it safe to use a drop-side crib with a properly installed support?
Drop-side cribs manufactured before 2011 can be used only if all hardware is intact, the mechanism locks securely, and the model has not been recalled. Consider upgrading to a fixed-side crib for enhanced safety.
Key Takeaways for Installing Crib Mattress Support
Installing a crib mattress support correctly is not just about following steps. It is about protecting your baby’s well-being through every stage of their development. The most critical points to remember are to always use manufacturer-provided hardware, maintain level and secure positioning, and perform regular inspections throughout the crib’s lifespan. Adjust the mattress height promptly as your baby grows to prevent fall risks, and immediately retire any crib with damaged components or recalled models. By using the right tools, adhering to safety standards, and conducting regular checks, you create a reliable foundation for healthy sleep. Whether setting up a nursery for the first time or reviving a family hand-me-down, taking the time to install the mattress support properly pays off in safety, durability, and peace of mind.