A broken air mattress valve can turn a comfortable night’s sleep into a frustrating leaky mess. Whether you’re dealing with a snapped cap, a loose base, or a slow air escape, replacing the air mattress valve is often a fast, affordable fix that saves you from buying a whole new mattress. This guide walks you through every step, from identifying your valve type to installing a replacement, using proven methods from leading brands like AeroBed, Air Dream, Intex, and Therm-a-Rest.
You’ll learn how to remove old valves safely, choose the right replacement, and seal it securely without special tools in most cases. By the end, you’ll be able to restore your mattress to full inflation performance, often in under 10 minutes.
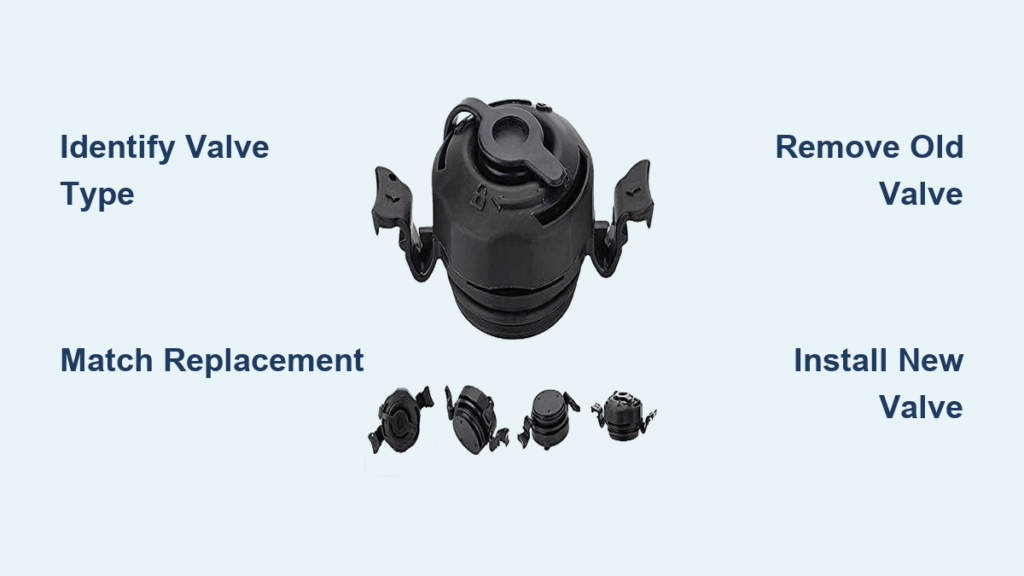
Identify Your Valve Type Before Starting

Before starting your air mattress valve replacement, confirm what kind of valve your mattress uses. The replacement method depends entirely on the design, and using the wrong technique can damage your mattress.
Snap-In Plastic Valves
These valves are common in AeroBed, SlumberAir, Air Dream, and Intex models. They feature a soft vinyl ring that snaps into a circular seat on the mattress, with a hinged plastic cap that locks open or closed. No glue is needed, and installation is tool-free and reversible.
Look for these characteristics:
- A flexible rubber-like rim around the valve base
- A black plastic ring beneath the cap
- No signs of adhesive residue around the opening
Adhesive-Sealed Valves
These valves are used in Therm-a-Rest, Neo Air, and self-inflating camping pads. They are bonded permanently with glue, and the base has barbs that grip the internal fabric. Replacing them requires a repair kit and curing time.
Look for these characteristics:
- A rigid, glued-in base
- Residual adhesive around the opening
- A flat, low-profile design common in outdoor gear
Pro Tip: If your valve lacks a snap ring or feels firmly attached, it likely uses adhesive. Never force removal, and check manufacturer specs first.
Check Valve Compatibility Before Buying
Not all valves fit all mattresses. Using the wrong replacement leads to leaks or failed installation, wasting your time and money. Always match by brand and model before purchasing.
Compatible Brands and Models
| Mattress Brand | Compatible Valve Type |
|---|---|
| AeroBed | Snap-in with TBL latch system |
| SlumberAir | Black ring + hinge support design |
| Air Dream | RV sofa sleeper valve (Flexsteel, Lambright) |
| Intex | Often compatible with Air Dream bladders |
| Therm-a-Rest | Repair kit with adhesive-sealed valve |
Where to Buy Replacements
- Air Dream valves: $37 from Bradd & Hall (includes shipping)
- Therm-a-Rest kits: Available at therm-a-rest.com
- Universal snap-in valves: Sold on Amazon and RV supply sites
Expert Note: Some Air Dream valves are marketed as cross-compatible with Intex bladders, offering flexibility for older models. Keep a spare valve if you use your mattress frequently, especially in RVs, guest rooms, or camping situations.
Gather Required Tools for Your Valve Type
The tools you need depend entirely on your valve type. Having everything ready before you start makes the job go faster and prevents frustration mid-repair.
For Snap-In Valves
- Replacement valve (brand-specific)
- Hair dryer (optional, for stiff vinyl)
- Clean hands or cloth
- Quarter or flat coin (for pushing the ring)
For Adhesive-Sealed Valves
- Valve repair kit (includes valve and adhesive)
- Pliers (for removal)
- Utility knife or scissors
- Clean cloth (for wiping excess glue)
Time Estimate: Snap-in valves take 5 to 10 minutes. Adhesive valves require 3-plus hours including cure time.
Remove the Old Valve Safely
Proper removal prevents damage to the valve seat and surrounding material. Take your time, especially with older or stiff components.
Snap-In Valve Removal Steps
- Open the valve fully by lifting and rotating the cap.
- Peel back the vinyl rim from the outer edge.
- Push the black plastic ring inward using your thumb or a quarter.
- Lift the entire valve assembly straight up and off.
- If the vinyl is brittle, warm it with a hair dryer for 15 to 20 seconds first.
Warning: Forcing removal can tear the valve seat. Always soften stiff material first rather than applying pressure.
Adhesive Valve Removal Steps
- Grip the valve base with pliers.
- Hold the mattress firmly around the opening.
- Pull straight out while twisting to dislodge the barbed base.
- Clean the seat thoroughly with a dry cloth, removing all old adhesive and debris.
- Ensure the surface is smooth and dry before installing the new valve.
Install the New Valve Correctly
Installation requires patience and attention to detail. A properly seated valve creates an airtight seal, while a rushed job leads to leaks.
Snap-In Valve Installation Steps
- Open the replacement valve fully.
- Align the hinge with the support on the mattress.
- Squeeze the vinyl ring toward the center.
- Feed the ring through the valve opening slowly.
- Continue until the entire ring passes through and seats under the outer lip.
- Smooth out wrinkles with your thumb.
- Close the valve cap securely.
Visual Cue: A properly installed valve has no bulges, kinks, or raised edges in the vinyl seal. Use a hair dryer if needed to relax the vinyl during smoothing.
Adhesive Valve Installation Steps
- Apply a thin bead of adhesive to the barbed end of the new valve.
- Insert the valve into the opening.
- Push and twist gently until fully seated.
- Do not force it too deep, as this can puncture inner layers.
- Wipe away excess glue immediately with a clean cloth.
- Let cure for at least 3 hours before inflation.
Critical Step: Never skip the curing time. Premature use breaks the seal and causes leaks.
Troubleshoot Common Problems After Replacement
Even with careful installation, issues can arise. These solutions address the most frequent problems encountered during air mattress valve replacement.
Valve Won’t Snap In
Cause: Stiff vinyl or misalignment
Fix: Warm the rim with a hair dryer. Realign the hinge and feed the ring slowly using a coin for better control.
Air Leaks After Replacement
Cause: Vinyl bulge or incomplete seating
Fix: Remove and reinstall. Check for kinks or trapped folds in the ring before sealing.
Adhesive Leaking During Cure
Cause: Excess glue not wiped
Fix: Clean with a dry cloth before it dries. Avoid touching the area until fully cured.
Valve Cap Won’t Lock
Cause: Debris in hinge or improper seating
Fix: Clean the hinge area and recheck alignment before closing.
Can’t Inflate or Deflate
Cause: Valve not fully open or clogged
Fix: Rotate cap completely. Check for blockages with a small tool.
Test Your Repair Before Regular Use
Proper testing confirms your repair worked and identifies any remaining issues before you rely on the mattress.
- Close the valve completely.
- Inflate the mattress fully.
- Let it sit for 8 to 12 hours.
- Check for air loss by listening for hissing.
- For camping pads, submerge in water to spot bubbles.
- Re-seal if needed, especially with adhesive models.
Success Sign: No air loss overnight means a solid repair. If you notice deflation, revisit the installation steps to check for proper seating.
Extend Valve Life with Proper Care
After replacement, proper maintenance keeps your valve functioning for years. Simple habits prevent premature wear and damage.
Post-Replacement Care
- Always close the valve tightly after use.
- Avoid over-inflation, which stresses the valve and surrounding material.
- Store the mattress fully deflated and dry to prevent mold and vinyl degradation.
Long-Term Maintenance
- Clean the valve cap periodically with a damp cloth.
- Inspect the seal before each use, especially after storage.
- Replace valves proactively if you notice stiffness or cracking.
Pro Tip: For RV or guest room use, keep a spare valve and hair dryer handy for quick fixes. Many failures stem from improper use, not poor materials.
Know When to Replace vs. When to Buy New
Sometimes a valve replacement isn’t enough. Understanding when to repair versus replace saves money and frustration.
Replace the Valve If:
- The cap is cracked or won’t stay closed
- The base is loose or wobbly
- Air escapes even when closed
- The mattress won’t hold inflation overnight
Consider a New Mattress If:
- Multiple punctures exist beyond the valve
- The material is brittle or torn
- The internal bladders are separating
Cost Comparison: Replacement valve costs around $37. A new air mattress costs $100 or more. Repairing pays off, especially for high-end or built-in RV models.
OEM vs. Generic Replacement Valves
Choosing the right replacement affects durability and fit. Understanding the differences helps you make an informed decision.
| Factor | OEM Valve | Generic Valve |
|---|---|---|
| Fit | Perfect match | May require adjustments |
| Durability | High (designed for model) | Variable |
| Price | $37 (Air Dream) | $10 to $25 |
| Warranty | Often included | Rare |
Recommendation: Use OEM valves for RV or built-in mattresses. Generics may work for temporary fixes but rarely match the long-term durability of original equipment.
Use Video Guides for Visual Help
Sometimes seeing the process makes it easier. Two key video tutorials are available for Air Dream valves, showing real-time installation techniques.
- Video 1: Replace only the top cap for minor damage
- Video 2: Replace the entire valve assembly for full restoration
These videos, hosted by Bradd & Hall (the official supplier), demonstrate how to feed the vinyl ring smoothly and avoid common kinks.
Access: Visit the supplier’s website or YouTube channel for step-by-step visuals if you need additional guidance.
Frequently Asked Questions About Air Mattress Valve Replacement
How do I know if my air mattress valve is replaceable?
Most snap-in valves (found in AeroBed, SlumberAir, Air Dream, and Intex) are replaceable without professional help. Adhesive-sealed valves (used in Therm-a-Rest and camping pads) are also replaceable but require adhesive and longer curing time. Check your manufacturer specifications if you’re unsure.
Can I use a generic valve for my air mattress?
Generic valves may work for temporary fixes but often require adjustments. For the best fit and durability, use OEM (original equipment manufacturer) valves designed for your specific model, especially for RV or built-in mattresses.
How long does it take to replace an air mattress valve?
Snap-in valves typically take 5 to 10 minutes. Adhesive-sealed valves require 3 or more hours due to curing time. Plan accordingly based on your valve type.
Why is my air mattress still leaking after valve replacement?
The leak likely comes from improper seating. Remove the valve and check for bulges, kinks, or trapped folds in the vinyl ring. Reinstall carefully, ensuring the ring passes completely through and seats under the outer lip.
Can I replace just the valve cap instead of the whole valve?
Yes, for minor damage like a cracked cap, you can often replace just the top cap. This is shown in Air Dream video guides. However, if the base is damaged or loose, replace the entire valve assembly.
Key Takeaways for Replacing Your Air Mattress Valve
Replacing an air mattress valve is a simple, eco-friendly fix that restores comfort and avoids waste. Whether you’re working with a snap-in AeroBed valve or a glued Therm-a-Rest unit, the right tools and technique make all the difference.
The most important steps are identifying your valve type first, matching the replacement to your specific brand and model, and following the proper installation sequence. For snap-in valves, take care to feed the vinyl ring completely through without kinks. For adhesive valves, never skip the 3-hour curing time.
With proper care, including closing valves tightly after use and storing mattresses dry and deflated, your replacement valve can last several years. Keep a spare valve on hand if you use your air mattress frequently, and you’ll be prepared for quick fixes whenever needed.